Friday 30 January 2015

Reviewing other group members stop motion animations

On wednesday this week the whole group got together to present our animations and discuss the production process. It was interesting to see the similarities and differences in peoples experiences and final product.

Because I'd had the opportunity to speak with most of the group during the production process, discussing difficulties and seeing them work, I really enjoyed watching all of their finished pieces. As they weere presenting their final pieces it felt as though they were sharing theirs journeys with us, and although quality of the finish varied, that wasn't always a reflection of the efforts.


Solution no Pollution
by Rhian Davies

The  Animation that stood out for me was this one produced by Rhian Davies.

 
"This is a Fantastic, simple, well produced Animation. That shows what can be done with very little materials and funds " (Me, Just now).


Not only is this a really professional looking stop motion animation, which presents a really clear message, it also shows a lot of technical and creative ability. Rhian Produced this aniamtion completely on her own, and she spent a week on the whole process.
 
Rhian explained that she had used paper for the animation because it would be easier and less time consuming to work with. What is clear though, is that the time that she saved using paper, was put back into producing a finely detailed, visually creative piece. All the visuals were very cleverly done, but i think my favourite parts were the representation of the wind coming in and the detail in which the leaves were scooped up and blow out of the scene. The fire part was also very clever and Rhian explained how that was done. She cut out three separate fire, different heights and then to give the appearence of it moving she turned them back to front between frames.
 
The sound worked very well for the peice too. The soundtracks volume was well balance with the sound effects and both added to the animations effect without overpowering it. The consistency of the frame was also very good, there were only a few changes in light and shadows, obviously due to the fact that it was produced over a number of days. The camera was kept still throughout and the number of frames and smoothness of the animation was also good. Im sure that the number of frames could have been increased to create an even smoother image, but given that it took a week to produce this, that might have been difficult.


General group evaluation


From listening to and talking with the groups as they presented their animations it became clear that many of us shared similar experiences and gained similar insights. The things we had learnt included the patience that was required to work with stop motion, the difficulties of applying sound to a movie and other general insights regarding lighting and shadow, the limitations of certain materials and planning and working in groups.

What possibly stood out more though was the variety of the final peices and how this might have reflected the variety of learners in the class. What this demonstrated to me was that in any given class, a project like this could provide the opportunity for a person to individualise their own learning, allowing the learner to work with their own focus, while promoting new skills.

To take myself for example, I'm not drawn to working creatively in an artistic sense, you only have to read my blogs to understand that, so in this animation I choose to use a very simple claymation ball design to avoid having to draw and create detailed designs. Your initial reaction to this might be that in this case having the freedom to choose my own design was negative, because I simply choose to avoid something I couldn't do and focus instead on my own agenda, a smoothly linked production for example. However, having this freedom engaged me in the task, in which I went on to develop others areas I don't see myself as being strong in such as ITC and working in a group. Having that learner freedom created a give and take, compromise that worked for me.

Although not everyone appeared to enjoy the entire process of making the animation, it seems on reflcetion that after completing the task, most of the group felt they had learnt something from it and felt quite proud of their final work. Creating an stop motion animation is something that I would definately encourage others to do especially in a learning environment.
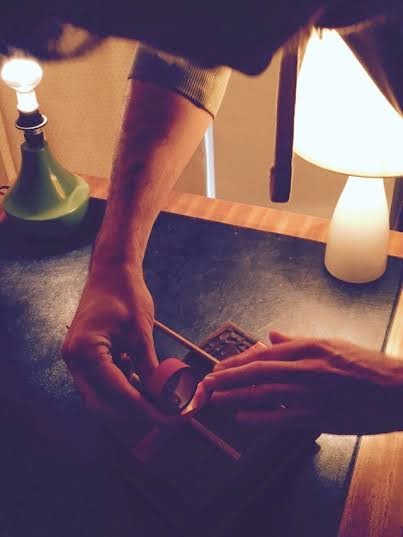
Wednesday 28 January 2015

Creating our Stopmotion Animation


The time had finally arrived for Sam and myself to begin our first Stop motion animation. The research had been done, the storyboards were written and the materials acquired. now all that we needed was to be in the same place at the same time to get things started. I guess a certain amount of collaborative skills were used in that process and we decided to set out two separate full days for making the animation. The first day for filming and the second for editing and sound.


Creating a space and setting up

We began nice and early to make the best use of time and the first part was the create a space and build our set. We decided to use my house and work desk for this as there wouldn't be many distractions and if we ran over the day planned for filming we would be able to leave things in place. We built the set on my desk and move things around to create an artificial back wall for the desk so there was a short depth of field. We decided not to purchase a camera/ phone tripod and not only did we save money but we had good fun being creative and designing our own camera apparatus.


After doing our research we decide to use two lamps, to limit shadows and create a softer light. We placed these either side of our set either side of our camera to create and even light. We experimented using a third lamp and also with removing and replacing the shades to see what different effects it would create and what worked best with the camera. 
We measured out our newplast and decided how much we'd need to leave spare in case any bits were mushed together with other colours. A little practical maths was used in order to work out how much newplast would be need to make the final piece, which would be a combination of the smaller pieces. 


Filming

 In filming process took us about ten hours, but that was including setting up, breaks and lots discussion about various techniques and problems as they arose. On reflection, I'm glad that for your first production we decided to keep it simple as it was a good opportunity just to learn all the things that can go wrong. 

Keeping things in place- We thought at the time, that the camera app we were using didn't have an option to have a shadow of the last image taken on the scene when lining up the next shot (we've since found out there was). So at the time we worked on the simple technique of placing a small item on the set in place on the piece we were moving. In time we also came to realise that this was good for remembering the direction pieces where moving in too. This was particularly useful when it came to the scenes where the objects were jumping. 


Keeping the Frame Still- We wanted to make sure that we could keep the frame as still as possible throughout the filming so we used the newplast to tack down all the part of the set and also the make camera tripod. We even stuck the camera to it tripod. The main problem we had though was with the touch screen, as tapping it to take the shot was difficult to do without moving the camera slightly. this was one of the disadvantages of using the phone. A webcam through Zu3d could have been operated remotely removing this obstacle. Between filming and writing the post I have since found out that you can remotely operate the camera on a phone using a headphone remote, and the same button you use to answer calls.

Problems with the light- Another disadvantage of using the phone was that is was constantly refocusing and filtering light differently as light changed slightly throughout the day. We did close the curtains but that did not block out the light completely. Because filming can be a long process, I'd highly recommend using a room where you can block out all light, or if you are filming over a number of days, plan to do it around the same time. Also, if your camera has an automatic white balance, you may need to turn this off.


Editing

We met up on a separate day to do the editing, again giving ourselves a whole day to go through the process. The first obstacle we came across was saving the final product into a movie on Sam's phone so we could upload it to the Macbook. Because we had used ultra HD we had already had to delete large amounts of Sam's phone data in order to take all the pictures. we then had to delete further pictures and the whole of Sam's music in order to create the movie file. Again this was another oversight in using the phone app for this longer animation. i think the ease with which we were able to then upload it and edit it on the  Macbook possibly made up for any initial problems. We were able to change the speeds of individual frames easily, just as you can on Zu3d, and then began to play around with creating a title. We had originally thought to use a claymation title, but we decided to vary the materials used and take inspiration from one of the many stop motions videos on youtube.

Sound and Music- After creating our title and timing the whole piece correctly, we began to work on the sounds and music. We had storyboarded the SFX so we knew what we were looking for and began to trawl through free sound clip sites. After unsuccessfully finding ones which suited we began to experiment with creating our owns sounds. The problem that we found was that because we where sourcing sounds from all different place that the sounds didn't seem to quite fit with the animation. even slowing down the piece and changing the pitch left the sound clips sounding as though they didn't come form the scene. In the end, in order to maintain the flow of the piece we settled for a music track which fit with the theme of the piece. 

The finished Article: here it is !!


Self Evaluation 

The original concept of this piece was to create a simple claymation stop motion video that explored the subject of conflict in a creative manner. I was happy that the overall visual piece reflected what i had initially envisaged, however, the I believe the message was lost through the poor application of sound to the piece. Initially many different SFX had been storyboarded to the piece, those which included battle sounds and movie clips. I think that with better planning, practise and subsequently better experience we would have been able to do this, but none the less I was pleased with the overall product.

Working on the animation allowed me to see the many challenges and therefore potential skills to be acquired through making an animation and also gained an understanding that those challenges and skills would be very different for a variety of people and a variety of ages. To take myself for example, when hearing at the start of the module that i would be making a stop motion animation I knew immediately that my biggest challenge would be working with ICT, an area I know that i need to develop confidence in. I also realised that working in a group or pair would be difficult for me as i usually prefer to work alone. However, needing some assistance with the ITC side of things pushed me into working with Sam and we pooled our skills to create what turned out to be a good team. Working on a stop motion animation could also help to develop any number of skills including:

  • Individual patience
  • Working with others
  • Research skills
  • Critical thinking and expression 
  • ITC skills 
  • Sound and audio
  • Lighting
  • Art and Design
The above list is not a definitive one and this production has help me to understand there is something different to be gained by everyone from this task. Where as I feel that I benefited from working with Sam and developing my patience for ITC, other members of the group may have taken it as an opportunity to express their interest and feeling about challenging contemporary subjects. This project for me demonstrated the significance of process over outcome. Although I was reasonably pleased with the final product, I believe it will be the skills I learnt during the process and enjoyment of making the animation that I will reflect upon most.


Planning a Stop-Motion Animation

Coming up in the next couple of weeks, myself and Sam Gardner are going to be making our first 2 minutes long stop motion animation. but before we get started we have some planning to do. Ive broken down my part of the planning into 3 parts:


  • Research
  • Storyboarding 
  • Getting Equipped

Research

Choosing what kind of animation to do- Bearing in mind that its our first attempt at stop motion, and that I'm not particularly computer savvy myself, I decided to start by checking out a few SIMPLE stop motion movies to give me some inspiration. This was one of my favourites. 


I particularly liked this one because the creator has used simple props such as Plasticine, which is easily moulded into different shapes and they have also used the household environment as the scene. 


Because I'm not particularly artistic, and because the technological part of the production will probably be a challenge for me, I would like to use simple Plasticine shapes and a household set for my production. The creator of this stop-motion also makes particularly good use of the sound too further impress the effect of the animation. Stopmotioncentral.com also suggest the use of clay, or claymation. 'The good thing about clay animation is that you are only limited by your imagination. Clay is a very versatile medium. It can be moulded and shaped in to anything your imagination can come up with'.

Getting some tips to get started- Before taking the plunge, it's also a good idea gather some tips from some off the many fantastic websites which specifically focus on stop motion animation. Here are some of the top tips I came across:

  1. Create a storyboard- get an idea of what your story is going to be. Make sure it has a start, middle and end, and that it tells some kind of story.
  2. Decide on characters- Decide what characters are going to be in your movie and decide what materials they are going to be made from. Whatever materials you use, keep it simple, there's less chance of bit falling off and getting lost. 
  3. Scene- Create a scene or backdrop. Old cardboard boxes can make a good set, decorated with cut-outs from magazines.
  4. Lighting- household lighting is fine, you can use a few simple table lamps. To avoid shadows or soften the lighting make sure its cross lit by place lamps at either side of the set
  5. Make a list of all the materials you will need and get them all ready before you start. Each time you leave your production and come back to it you risk losing place of where all your pieces are, or somebody may have disturbed you set. 

Storyboarding 

Storyboarding is a great way of planning out your stop motion production and saving time and energy in the editing process. It will give you something to reference while creating the movie, leaving you to focus on the technical side and it will also help you to decide what materials you will need. Here is the storyboard Ive created for our production.


Getting Equipped 

Because we have decided on a relatively simple claymation the only materials I needed to source was the Plasticine, the camera and stop motion app. The plasticine we bought was newplast and was available online for around £2.20 or at Hobby Craft for £2.99 were we bought it.


There are a wide variety Stop Motion animation apps and programmes available ranging in price and quality. luckily my co-producer is own an I-phone and Macbook so we are planning to use the free app
Stop Motion Studio by Cateateravailable on itunes: https://itunes.apple.com/gb/app/stop-motion-studio/id441651297?mt=8

Stop Motion Studio is a four star customer rated app that uses ultra HD resolution. We can create the animation using Sam's phone as the camera and then easily export it to the Macbook for editing. 


Here are a few of those websites I used to get some tips on getting started:
http://www.edenproject.com/blog/index.php/2013/02/how-to-animate-stop-motion-tips-from-aardman/
http://www.stopmotioncentral.com/bestcameras.html
http://digital-photography-school.com/5-tips-for-making-a-stop-motion-video/
https://www.youtube.com/watch?v=Mtu2dffLRTk

Tuesday 27 January 2015

The Impact of an IT Rich Environment on the Learner


"If we teach today as we taught yesterday, we rob our children of tomorrow" 
(Dewey, 1944)

Since John Dewey wrote the above quote in 'Democracy and Education' 70 years ago, the rate at which rate at which technology advances has increased exponentially. Technology has changed the world of work and play and education in the 21st century applies a 'vast array of digital tools designed to motivate and engage learners' (Peace, 2015). 


New ICT tools should not just be seen as innovations designed to develop technical skills, but rather as tools to develop the critical, creative and collaborative skills needed to flourish in a information and communication environment (Henry, 2015). Recent years have seen researchers and educationalists seeking to create a deeper and more critical perspective of the use of ICT, including its role in 'aquisition of the appropriate knowledge and skills necessary to adapt to the labour market' (Raboca, 2014).

The Es 
Chapter 16 of this book discusses the Es


The efficacy of one such tool, Web 2.0,was the subject of reseacrh conducted by Mandy Peace in 2010 alongside student teachers at the University of Wales- Swansea in South Wales. Web 2.0 is a term given second-generation web-based services, which the research found beneficial in a number of areas that were termed 'Es of Web 2.0' (Peace, 2015):

Enjoyable and exciting- Pupils enjoy being able to show of their work to others and, through Web 2.0, they can share their efforts with a wide audience. It can be fun to discover new ways of presenting information so that it is clear and interesting for all to read. 

Energises Learning- When pupils work together on an IT task there is often a buzz to their work. They exchange ideas, challenge one another's understanding and generally learn from each other, as well as from sources on the computer.

Emancipatory- Working on Web 2.0 tasks provides pupils with opportunities to take responsibility for their own learning. Using the computer they can search out information not normally available to them in the classroom. 

Developing Critical, Creative and Collaborative Skills
Having a IT rich environment can also be viewed as important in fostering critical, creative and collaborative skills and Buckingham (2003) points out that critical and creative activities are closely related. Buckingham speaks towards creating an understanding in children of the digital world we live in through developing understanding of four concepts- production, language, representation and audience. 


Supporting a variety of learners   

It is now widely understood that within any given learning environment there will a variety of different learning styles and different ways of assimilating knowledge. Having an IT rich environment with a wide variety of ITC tools available is just one way of meeting those needs. Although in the past new technological advances have been expensive, and sometimes still are, there are also now many cheap and free apps which can be used in the learning environment. Follow this link to check out some of the best free educational apps: 

http://www.edudemic.com/free-education-apps-sorted-by-grade-level/


Increased student satisfaction 

Studies in higher education have also found that use of ITC in the form of open source learning platforms such as moodle can greatly increase student satisfaction. Havice (2010) found that where students were able to playback and pause rich media presentations there was greater reinforcement of course content and better student engagement in the course. 


Some Criticisms

Although the advantages of using ITC are much more obvious than the disadvantages, there are certain pitfalls to watch out for to maintain a good use of ITC tools. 

As Peace (2005) points out, 'it is important not to get mesmerised by the technology, as this would lead the way to technology being the important aspect rather than learning through the technology'. This was also something discussed by Dewey in 'Experience and Education' (1938) where he notes that 'an enjoyable experience can lead to no particular learning or, worse, actually have negative outcomes and be a miseducative experience (p26). Ansbacher points out that criticisms along these lines have been directed from time to time at museums and science centers (1998). While exhibits with heavy reliance on ICT may be fun, and deliver the information relatively painlessly to the learner, they may have a negative effect since the learners hasn't had to acquire the knowledge, or may just have become solely focused on having fun. 

Naturally when working with web based services there is always concerns about web safety, although this also offers an opportunity for learning, as Byron (2010) points out, that children should learn about web safety, the same as they learn about general real world safety. Peace (2015) agrees, suggesting that 'developing respectful relationships is an important part of primary schooling' and that the subjects can be brought together 'using an online discussion of the word respect'. 

Given the knowledge that the teacher plays an important role in the facilitation of positive learning experiences, it is no surprise that research has revealed that lack of teacher training and experience in using ITC in the classroom can lead to a negative impact for the learners (Raboca, 2014). Mishra and Koehler posit that in order for a teacher to effectively integrate technology into their teaching they must develop three types of knowledge, Content Knowledge, Technical knowledge and Pedagogical Knowledge (TPACK) (2006). 


  • Content knowledge refers to the teacher having the essential academic and subject knowledge required to teach that subject. 

  • Pedagogical knowledge is of the teaching skills, curriculum knowledge and of thinking and learning skills
  • Technological Knowledge would be keeping up to date with which technologies best meet certain learning requirements and certain learners.
So what can teacher do to avoid these barriers to integrating ICT in the classroom. Groff and Mouza (2008) offer this table to highlight some of the obsticles, limitations and challenges to integrating technology in the classrom and also provide a framework for helping teachers to predict obsticles before they begin. 


To see an example of the framework you can view the full article:
Groff, J., & Mouza, C. (2008). A framework for addressing challenges to classroom technology use. AACE Journal, 16(1), 21-46. 

Teachers can also make sure they stay up to date by visiting Educational technolgy exhibitions, such as the BETT, held annually at the EXCEL in london. BETT or The Bett Show (formerly known as the British Educational Training and Technology Show) is an annual trade show in the UK that showcases the use of ITC in education. Heres a few higlights from this years exhibition:


To conclude 
To come back around to the Dewey quote that this post started with, it seems more important then ever now in a global knowledge based environment,where technology increases and changes quicker than teachers can teach, that education doesn't remain stagnent, and that teachers strive to teach in new and innovative ways. It also seems that through expanding the the sheer volume of information available, through tools like Web 2.0, that children are being encouraged if not forced to think more critically about how they choose and consume knowledge. It could also be suggested then that this aquisition of critical thinking skills and ability to source and assimilate information, learning to learn essentially, is much better suited to meet the expotential growth which sees many of the technologies taught in schools as nearly redundant by the time the pupils reach the workplace.


References

Raboca, H M (2014), ICT in Education- Exploratory Analysis of Students' Perceptions Regarding ICT Impact in the  Edcuational Process

http://scholar.google.co.uk/scholar?q=ICT+IN+EDUCATION+-+EXPLORATORY+ANALYSIS+OF+STUDENTS%27+PERCEPTIONS+REGARDING+ICT+IMPACT+IN+THE+EDUCATIONAL+PROCESS&hl=en&as_sdt=0&as_vis=1&oi=scholart&sa=X&ei=IjXJVLXeHo7uaNz1gdAM&ved=0CCAQgQMwAA

Havice, P A (2010), The Impact of Rich Media Presentations on a Distributed Learning Environment: Engagement and Satisfaction of Undergraduate Students: 


http://www.readperiodicals.com/201004/2084365771.html


Peace, M (2015), Web 2.0 and classrooms: Younie, et.al, (2015), Teaching and Learning with ICT in the Primary School. London: Routledge


Wednesday 19 November 2014

The Importance of sound

Have you ever stopped to consider, when watching a movie or an animation, how important the sound is to the experience you are having. We can only process the one image appearing on the screen in front of us at one time. however, it is possible for us to hear and interpret many different sounds at one time. Consider this quote with regards to animation:

"A truth whispered among animators is that 70% of a show's impact comes from the sound track.” Michel Dougherty


Try watching this stop motion animation short without the sound first, and then with the sound and notice how you respond to it.    


Well? How did you get on. I actually only watched the first 30 seconds without the sound, before returning to the start to watch the whole thing with sound; and doing that reminded me of an interesting point made today. When we sit down to watch a movie, we will often tolerate a slightly poor picture, a reflection on the screen maybe or a corner or side of the frame missing. But if the sound quality is comprimised, muffled or out of sync we can often find it almost impossible to watch.

Different types of sound

The sound that we hear in any text will be either diegetic or non-diagetic sound: and the easiest way to explain the difference is as follows:

Diegeitc Sound: Refers to the sounds that both the charcters on screen and the audience can hear. This might be sounds effects, like the sounds of footsteps or maybe music playing in the scene, in a bar for example.

Non-Diegetic Sound: Refers to sound that only the audience can hear and is commonly refered to as the soundtrack. Usually this would be music (score) but could be sound effects used to build tension or amplify whats happening on the screen.

Sound can be used as a powerful tool to:
  • Sychronise our senses; brining together the images and the sound to create a sensory rhythm.
  • Direct our attention to a particular part of the scene, e.g the foreground or the background.
  • Or maybe misdirect us and create confusion.
  • Clarify what we are seeing on the screen e.g a punch or slap connecting.
  • And act as cues to create expectations in the audience e.g footsteps increasing in volume creates the expectation of someone getting closer.

The sound of silence. It is also worth rembering that the use of sound will also increase the power of silence in a scene. Writing this, I am recalling watching many a horror movie were silence is used to amazing effect; my breathing paused along with the sound, waiting with gritted teeth for the impending horror that will break the silence!

References:
http://filmsound.org/


Thursday 6 November 2014

Animation For Learning


The world we live in, childhood and the way we learn is changing rapidly in modern society and technological advances continue to reshape the skill sets necessary for students to succeed both in the classroom and in the workforce (Silva, 2008). Therefore it is important that we try to think of innovative ways to teach in order to meet these needs.


In recent years the animation tools that would have been expensive and unaccesible to schools are now more readily available and are being used by teachers as tools to encourage and develop childrens learning in a way that is not only fun, but effective. By using animation children develop skills competencies in:


  • Story telling
  • Visual communication
  • Cognition, emotional, ethic and aesthetic aspects
  • Observation and sensory aspects
  • Concentration
  • Problem-solving and innovative aspects   (VIA University College, 2013)


One particular product which we have been using to create an understanding of animation as a learning tool is ZU3D. Zu3D is currently being used in a number of schools promoting the use of animation to enhance learning in the creative curriculum (Edspire, 2011).


Zu3D stop-motion animation software has been developed to give children (and adults) of all ages the freedom to create amazing animated films quickly and easily, in school and at home. Combining an intuitive interface with stunningly powerful features. Educational & fun!


Through the initial story boarding process and the actual production of the animation, ZU3D can be used as a valuable literacy tool in helping children to develop a narrative structure. The ability to communicate information verbally and graphically can be viewed as a necessary skill that should be developed (Silva, 2008).


Children will also have a chance to practice good speaking and listening skills as you can also add narration to the animations, meanwhile the whole time developing their ITC skills (Edspire, 2011).


‘Technology and Engineering Teacher’ (2013) suggests The inclusion of a technical animation curriculum into secondary education provides numerous advantages for a learner. The use of a content-rich, activity-based curriculum and the addition of project-based learning activities, which include the use of multiple software applications, allow for an educational experience that prepares the learner… with a general skillset for future educational needs.


References


 Software Review- ZU3D. Available at: http://www.edspire.co.uk/year_2011/01/17/software-review-zu3d/

VIA University College. Animation as a Learning Tool. Available at:


http://zu3d.com

Silva, E. (2008). Measuring skills for the 21st century. Washington, DC: Education Sector. Available at: www.educationsector.org/usr_doc/MeasuringSkills.pdf


Wednesday 22 October 2014

Making a Traumotrope and Zoetrope

Last week we began talking about stop motion animation and looked at a few examples. In today seminar session myself and few other group members had a go at making a few of the simpler, earlier examples of stop motion animation in order to find out what kind of skills might be used or developed during the process.

The traumotrope was a popular 19th century tot which consists of a single paper disc with a picture drawn on each side. String is attached to either side of the disc and is then used to sin the disc back and forth, creating a sloid image out of the two images on either side. The Traumotrope demonstates persistance of vision and simple toys of this nature are recognised as important antecedents of cinemantography and in particular of animation.

Here is my attempt at a traumotrope:


It seemed like it would be a simple task, but i found myself using skills id not used since school.


While the task essentially started as a creative process, it required both mathematical and scientific undertsanding to make sure the traumotrope worked.


Being given a task and left to complete it allowed us to develop problem solving skills and required patience, reseacrh skills and interpersonal skills, for finding out where other people had gone wrong so you didnt need to make the same mistake


As you can probably see, im no artist, but the task still allowed me to focus of areas of strength, for example the technical side.


But once it was alltogether, did it really work?